- Messages
- 235
- Reaction score
- 41
Update time:
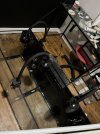
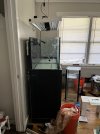
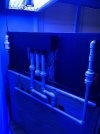
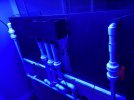
Plumbing Changes
After cracking 2 of the 5.5 gallon tanks, I have accepted that it’s not meant for me to drill and I am throwing in the towel. I will purchase one more 5.5 gallon tank and use it as an ATO reservoir instead of housing my filter socks. With the filter socks moving into the main sump, I’ve reduced the size of the refugium and at this point, it’s not big enough to do much so I may fill that area with bio blocks or some bio filtration media. Over the top of this section will be the algae scrubber which I hope will do most of the nutrient removal work.
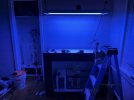
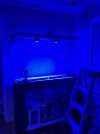
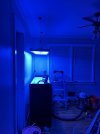
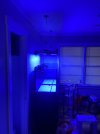
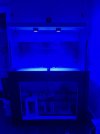
Lighting
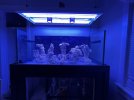
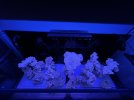
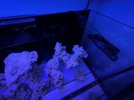
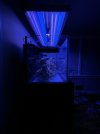
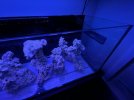
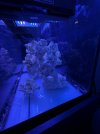
Initially, I mentioned using Kessils to supplement the 8 Bulb T5 fixture and add some blue light to the tank. I’ve since decided to save a little money here and go with a few Nicrew 30W pendant LEDs from Amazon. I’m not relying on these to provide any real coral growing light to the tank but solely for the color it gives when I look at the tank. I’ve gotten two of them in the mail and I really like the color of light they give off. Can’t wait to see them over some corals and sea critters. They do leave a bit of a dead spot in the middle of the tank so I went ahead and ordered a third light and the hanging hardware for the T5 fixture. Once I get the T5s hung up, I’ll be able to get the height of the lights set in place and that’ll determine if I need the third nicrew pendant. If it turns out I don’t need it, it’ll serve as an excellent light for my Coral/invert QT tank.
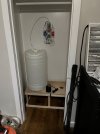
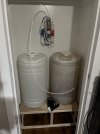
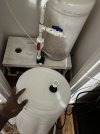
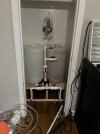
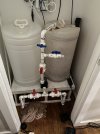
Mixing Station
The original plan was to stack the tanks vertically, however, given the way everything fits in the closet, it may be better for it to be a horizontal arrangement. This allows me to build a table top over the containers that I can use for other reefing activities.
Plumbing Changes
After cracking 2 of the 5.5 gallon tanks, I have accepted that it’s not meant for me to drill and I am throwing in the towel. I will purchase one more 5.5 gallon tank and use it as an ATO reservoir instead of housing my filter socks. With the filter socks moving into the main sump, I’ve reduced the size of the refugium and at this point, it’s not big enough to do much so I may fill that area with bio blocks or some bio filtration media. Over the top of this section will be the algae scrubber which I hope will do most of the nutrient removal work.
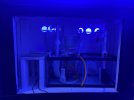
Lighting
Initially, I mentioned using Kessils to supplement the 8 Bulb T5 fixture and add some blue light to the tank. I’ve since decided to save a little money here and go with a few Nicrew 30W pendant LEDs from Amazon. I’m not relying on these to provide any real coral growing light to the tank but solely for the color it gives when I look at the tank. I’ve gotten two of them in the mail and I really like the color of light they give off. Can’t wait to see them over some corals and sea critters. They do leave a bit of a dead spot in the middle of the tank so I went ahead and ordered a third light and the hanging hardware for the T5 fixture. Once I get the T5s hung up, I’ll be able to get the height of the lights set in place and that’ll determine if I need the third nicrew pendant. If it turns out I don’t need it, it’ll serve as an excellent light for my Coral/invert QT tank.
Mixing Station
The original plan was to stack the tanks vertically, however, given the way everything fits in the closet, it may be better for it to be a horizontal arrangement. This allows me to build a table top over the containers that I can use for other reefing activities.