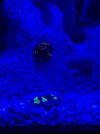
Picoreefguy’s 2 gallon build

picoreefguy

Well-Known Member
Market
Messages
1,692
Reaction score
53
Hey guys, I know it’s been a long time since I’ve been active but I’m back with another build. I had gotten burned out for a while and let my tank just exist. While my fish are fed, my ato reservoir stays full and my corals are alive and colorful, I have otherwise been pretty neglectful. There was a ton of algae and aiptasia everywhere, one of my vortechs had quit working so just I unplugged it rather than figuring it out what was wrong and fixing it, and I hadn’t done a waterchange in who knows how long. But a friend of mine recently got into the hobby and another one is just getting started. Helping them get going and seeing how excited they are has reignited my love of the hobby.

I was given a 2 (possibly 2.5, in not 100% sure but it’s tiny) gallon tank a little over a year or so and figured I would turn it into my next project tank. I had taken down my 5 gallon a couple of years before that due to a leak and was really wanting another cool project to work on. So I ordered some black acrylic and black vinyl and got to work. I made the overflow similar to how I did my 5 gallon pico where the water would enter, flow through a filter sponge then carbon and lastly matrix biomedia before overflowing into the return pump chamber and back into the tank. I did however make this one a peninsula style tank rather than having the filtration in the corner. Then I covered the glass where you could see filter parts in the vinyl and had planned to start it up eventually and just never did.

So it sat for a little over a year after that. Every now and then id look at it and think to myself I’ll get it started soon. I’m not sure I would have gotten the motivation to ever get it going if not for my friends getting started. But since then I’ve killed off some aiptasia started to fight the algae and fixed my vortech on my main tank and have started to get the pico running as well.

so anyway enough backstory. The tank is already 5-6 weeks along so there’s a good bit to cover but we all know you’re here for the pics, so here goes.

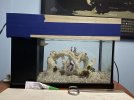
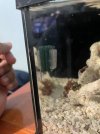
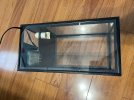
you can get a sense of the basic layout here. The water enters on the bottom left and returns to the tank on the top left. This Is when I had a thin acrylic lid I had cut for it but I’ve since replaced it with a glass lid I had laying around
1659486683619.jpeg

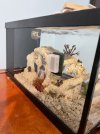
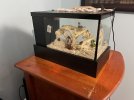
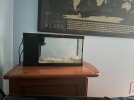
I decide I wanted to use it as a bedside tank so I’d give it plenty of attention. Here you can see the course mix of shells and crushed coral I’m using as substrate along with the stand little table I’ll be keeping it on. This was taken on day one of having water in the tank which was June 27th.
1659487128132.jpeg
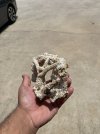
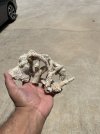
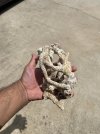
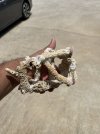
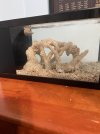
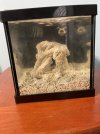
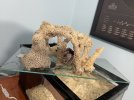
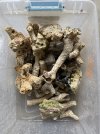
I had a box of random rubble pieces laying around and so I thought I’d try my had at a negative space aquascape. I think it turned out pretty well. It’s hard to really show well in pictures so I’ll just show a bunch of them.

raw materials
1659487274315.jpeg

finished product
front 1659487543327.jpeg
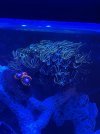
 
Left side view which is what I’ll be looking at most of the time.
1659487599238.jpeg

Top down view
1659487638030.jpeg

Right side view which will be the back from my viewing perspective.
1659487706122.jpeg

The rock in the tank, left view
1659487759318.jpeg

front view

1659487785574.jpeg

Some cool bubbling action shortly after I put the rock in.
1659487847879.jpeg

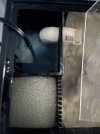
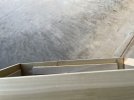
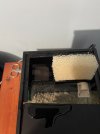
a view of the filter area. Here you can see I switched to a course sponge and moved the filter pad to the return pump chamber. I’m using a tiny pump made for a desk top fountain and in the confined space it was rattling and that’s not so great when it’s a bedside tank. So I took the filter pad and cut it into strips that were as wide as the pump and about 3x long as the pump is wide I wrapped one strip around covering the front, bottom and back and the other strip covering the sides and bottom so it gave me plenty of cushion and significantly reduced the rattle. I had several of these pumps laying around as well as one I had ordered for the project so I tested them all out in a specimen container. Two at a time head to head and chose the one with the best flow. They’re all rated for 80 gph but I don’t think any were even close. But they move enough water for I love you purposes here. So I took a cpvc 90 to bring the water through the wall of the filter and connected a coupler I modified to have a fan shape and pointed it up towards the surface so as not to directly blast any of the coral but still ensure good flow.
1659488275152.jpeg

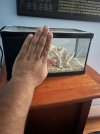
gotta give a hand for scale lol. You can also see the acrylic lid bending here which is one reason I switched to glass.
1659488342580.jpeg
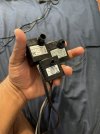
Here are some of the contenders for the pump. I had 3 others that were diff shapes and sizes that also fit but I went with this style of pump because it gave me the most room for filter pad to reduce noise. The top left was the one that I chose in the end. And the outlet size between the pumps wasn’t a factor because I swapped them around and tried each outlet on each pump and that pump with the widest outlet won.
1659488550883.jpeg
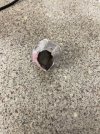
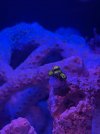
I stole this single barnacle from a cluster that a friend had laying around. I’m planning on eventually getting a barnacle blenny so it seems only right to give it a proper home.
1659488719100.jpeg
 
And I glued it in front and center
1659488806850.jpeg
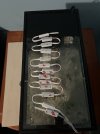
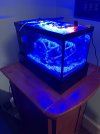
I got some cheap blue and white leds as well as a single module of green, red and orange for some color pop and variation from a company that specializes in lighting for signs. I got 12 blue, 6 white and one of each of the rest But when I tried the blue out it ended up being almost the perfect color so I’ll probably end up just using those and maybe integrate one or two whites. I also covered the part of the lid that goes over the filter with black vinyl to reduce algae growth and cut down a lid handle to be 1/3 it’s normal size to fit the tank better

1659489633916.jpeg

Early last week I went to visit Rit at Atlanta aquarium and ended up picking up a few frags. The tank had been cycling for a month at that point and I was starting to get the itch for some life and color in the tank so I got a frag of pipe organ, one of emeralds on fire and one of snitches.

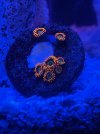
emeralds on fire
1659489237215.jpeg

snitches and pipe organ
1659489272885.jpeg

i later popped the zoas off their plugs and glued them to the rock directly and cut some smaller pieces off the pipe organ and put the main chunk of it in my 40 gallon tank. And took a frag of some king Midas zoas I had in the 40 for the pico.

king Midas, in this pic you can see the glow from the orange led that I’m testing out. It’ll look better once I have everything mounted in a proper canopy and off of the glass.
1659489399547.jpeg
That’s enough for now, I’ve been sitting on my phone typing and linking picturedI’ll continue in the morning
 
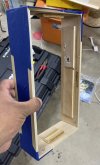
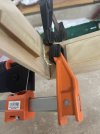
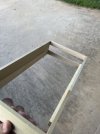
I just reread my post and holy crap there’s a bunch of typos and autocorrects. My apologies. Anyway continuing on with the build, over the weekend I decided to start building a stand and canopy for the tank. The stand is mostly for decorative purposes, I think the tank will look better with a matching stand and canopy. And it’s only a desktop stand rather than one that’s freestanding. I stole the very simplistic design from the ones I built for my 5 gallon years ago with a few small modifications. This time around rather than using butt joints at the corners I decided to try my hand at miters which look better imo. And with my previous stand I used metal L brackets that I glued in place at the corners to keep everything strong and stable. This go around I used small blocks of wood that I cut from 1x2 wood glued and clamped from both sides. This was because the brackets didn’t have a good bond with wood and the ones I used in the canopy rusted so this time I figured the blocks would have a good bond so they’d be stronger and wouldn’t rust so it should last a lot longer.

I used a couple different widths of precut poplar from the hardware store. The main body of both pieces are 2.5” wide and I think 3/16” thick. And to get the edges of the trim flush with the top of the stand I glued in some thinner scrap strips of the same material which hold the weight of the tank inside the stand. Since this whole setup will only weigh in the neighborhood of 25-30 lbs I’m not worried about the wood glue being the only thing to support it since the glue joints tend to be stronger than the wood itself

Taped everything together to let the glue setup
1659532013647.jpeg.
 
Then shortly after taping I put it on top of the tank to keep everything square while the glue set since I didn’t have proper clamps for this purpose
1659532854623.jpeg

once the glue had fully cured I went back and glued and clamped the little blocks into the corners for extra strength and rigidity.
1659533364418.jpeg

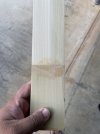
for the canopy I was just a little short on wood so I had to butt joint two scraps together to make one piece long enough to make the side. and on the inside I made sure to put extra glue and clamp the strip that holds it on the tank really well.
1659533748593.jpeg

in the process of clamping the strip down I guess it moved and I didn’t notice. I glued all the sides together and put it on the tank to keep it square like I did with the stand and when I went to take it off is when I noticed that I could feel the trim well below the bottom of the canopy on part of it. You can kinda see it askew here.

1659534252679.jpeg

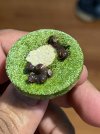
another difference between this canopy and the last one is I thought about ventilation ahead of time. with my last one it was a copy of the stand flipped upside down and I noticed that the lid warped because of all the excess moisture. I ended up cutting 3 huge holes in it to allow for ventilation. So this time I used one of the narrower strips and mitered the edges to match the front and cut it down the middle and glued one to the top back and one to the bottom back. This lets me also pass through the cords as well. I may add a strip of black cloth to reduce light spill as well.
1659535067212.jpeg
to fix the issue of it not being level I may just flip it upside down and glue in supports at the right spots. But I noticed the length is a little be off, it’s a fraction of an inch longer that it needs to be so I may end up rebuilding it before I put the lid on.

sorry for such a long winded intro but that gets us caught up to where I am now with it.
 
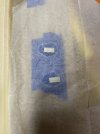
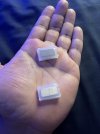
I lied, we’re not caught up. I forgot to mention that I had been trying to think of a glass cleaning solution since every magnetic cleaner I’ve seen is pretty big and would take up too much room in the tank. I had a bunch of these bar style magnets laying around and they looke to be about the perfect size for this project. Big enough that they could still attract each other with glass and a scrubber between them but not be obtrusive. So I took some wax paper, put a blob of silicone down and stuck the magnets in it. Then added more silicon on top of that and covered with the other half of the wax paper and flattened them with some wood. After they cured I cut away the excess silicone leaving a couple mm around the magnets and then repeated the process to make sure I got a really good coating. I think I’m gonna silicone a Brillo pad to the inside one and some plastic from a fish bag to the outside one to help it slide across the glass.

1659553056574.jpeg

1659553086574.jpeg
 
I’ve been pretty lazy this past week and haven’t gotten much done but i have made some progress. ive gotten the stand painted with a few layers and have sanded it and have applied the first coat of clear, ill add a couple more layers of clear coat sometime this week. I had to glue up a panal to make the lid for the tank since I didn’t have any pieces of wood wide enough. One of them was a little cupped so i wet it down and put it on the garage floor with some weight on it. Hopefully that will fix the cupping issue but if not ill just buy some more and start over with it. I also got the diy magnetic cleaner in the tank although i may add another layer of silicone to the wet side of it. It definitely works though. I also need to put something on the dry side to help clean the outside of the glass. I was going to use some plastic but i think a piece of cloth or something similar would be better since it would serve dual functions of cleaning the outside of the glass as well as allowing it to glide smoothly.

1660051578591.jpeg

1660051702179.jpeg

1660051768577.jpeg

1660051909189.jpeg
 
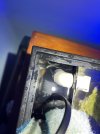
I’ve sprayed the stand with a few more coats of clear and gotten it under the tank. Now ive gotta get to work on the canopy. I also had these brightwell xport bio blocks laying around for a while and never put them to use but they are a great fit for my filter in this tank and i have plenty of room even with the few pieces of matrix in there. Funny thing is that these have an expiration date on them and they expired in march of this year. But its just ceramic and i dont theres anything that could go bad on them from just sitting around so im going to go ahead and use them.
1660229993780.jpeg

1660230055556.jpeg

1660230134638.jpeg

1660230216398.jpeg
 
Those bio blocks turn to dust in about a year. I pulled them from all my systems just a few months back
 
Those bio blocks turn to dust in about a year. I pulled them from all my systems just a few months back

well crap, that’s good to know now rather than a year from now though. I guess that’s why they put expiration dates on them lol. ill pull it and just fill that area with matrix. Thanks for the heads up.
 
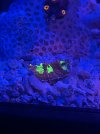
Minor update. I’m starting to get some algae growing on the rocks and i finally got to use my diy Magnetic scraper and it works really well. I’m not sure it’ll hold up too great with harder algaes but the for the initial film of algae i got on the glass it works fantastically. Also my emeralds on fire seem to have caught Zoa pox. I had noticed one of them staying closed and when i took a closer look it had little white dots on it. I wasn’t sure what was going on so i went to google and made a diagnosis. It wasn’t just the one that had it either about half of the emeralds on fire i have had pox. So for now i tried using peroxide to treat it and im not sure how its gonna go. I only treated half ( i broke the original frag off the plug and left the zoas that had grown onto the plug) just in case i end up killing them with the peroxide. I also popped the pox on one that is as treating with peroxide just to test. some people online seemed to think it worked so i figured id give it a shot. The untreated ones are now all staying mostly closed. they’ll open a little bit when the light is on but not even enough to see the middle part. I’m hoping the peroxide treatment works because these things are beautiful and id hate to lose them.
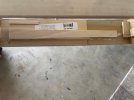
This is how they looked on thursday. You can see the closed up one circled in yellow that has the pox. That’s the first one i noticed having an issue. the rest seem to be fine at this point.
1660598764386.jpeg

Then at some point over the weekend they all just started to open less and less. This is them today.
1660598853118.jpeg

And here you can see a better view of the pox on the frag i treated with the hyrdrogen peroxide.
1660598932221.jpeg

I’m really hoping the treatment works. Anyway i also got some tisbe pods that i ordered on amazon. I’m not sure how to attach videos here yet but i did get a cool video of them crawling on the side of the bottle.
 
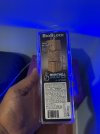
Huston, we have a problem. So a few nights ago my pump started rattling like crazy in the middle of the night and woke me up, i fiddled with it for a couple minutes to try and get it into a spot where it wouldn’t make noise and just ended up unplugging it so i could go back to sleep. the next morning I decided to order a sicce syncra nano since they are a brand that’s known for their quiet pumps. I got it in yesterday and put it in the tank with no luck. It’s just a tiny bit bigger than my current pumps so it touches the sides most of the time and creates some noise. I did test it outside the tank and its nearly dead silent. Another problem is that noise is being transferred to the tank itself from the pumps outlet tube. It interfaces with the acrylic via a street 90 on one side and a modified coupler on the other. i ended up putting the old pump back in and im not sure what ill end up doing to fix it it was loud again yesterday when i went to bed so i unplugged it overnight. im thinking i may try one of those silicone potholders around the pump to reduce contact with the glass since the filter floss isn’t cutting it anymore. And im considering placing an o-ring around the pvc where it meets the acrylic in hopes that it’ll reduce some of the vibration im going to check and see if i can find some silicone tubing that’s the right size as well because the vinyl tube im using is pretty stiff compared to silicone tube so im sure it transfers vibration pretty well.

It’s hard to see but the front of the syncra is touching the glass and the back is touching one of the baffles.

1660740799075.jpeg

But in other news i did end up fixing my canopy’s alignment problem, not completely but its much better. Rather than rebuilding or flipping it upside down and putting in blocks to hold it at the right spot i decided to cut a portion of the offending support out. It’s not the prettiest but it’ll be invisible once in use and there is still support on the back half of it as well as the other side and the front of of the canopy. I also glued in some rests for the lid to sit on once i get it done. It‘s a long way off from being finished but its progress. I still have to figure out some sort of hinge as well as a support to hold the lid open while im working on the tank. I’m trying to avoid metal because it’ll end up rusting or corroding so i want to build both of those parts out of wood or plastic.

here you can see the “repair” where i cut out the part that was making it sit way too far out of whack as well as the rear and front lid supports.
1660741086052.jpeg
 
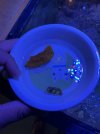
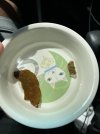
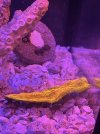
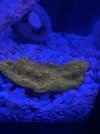
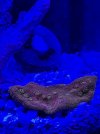
So i was working on my friends tank yesterday killing off some aiptasia and clove polyps and i noticed this red chalice and a purple and green favia that had grown enough onto the sand to have little frags broken off. these along with some others were corals that i keep in my friends tank (they used to own the lfs i helped at and decided to keep the tank when they downsized to a dog grooming shop and i still help maintain the tank from time to time.) because either my tank was too full or i wanted a backup in another tank in case of disaster. so anyway I wasn’t planning on making or bringing home any frags so i was really unprepared. I ended up borrowing a cat food dish to take them home in. Not my finest moment but it worked lol. So i got them home and into my tank. They are both a cracked down the middle but they should heal up after a while. The red chalice is just barely broken so im not worried about it but the favia was folding over itself when the water sloshed around so it might have some trouble. the chalice is also pretty large compared to what i wanted for the tank so i may brake it at the crack and put the bigger piece in my main tank. Anyway here are some pics.

Red chalice mother colony.
1661009256603.jpeg

Frags in a dish.
1661009971675.jpeg
1661010035925.jpeg

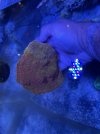
Red chalice. took the pic a couple different times immediately after putting it in the tank to try and get a good repersentation of its color but its near impossible. In one pic it looks orange and in another it looks purplish red. The last pic of it looks pretty close to what i see. The last one is also today about 24 hours after i put it in the tank and you can already see its little feeder tentacles starting to come out.
1661010262347.jpeg
1661010383511.jpeg
1661010520255.jpeg

And here’s a couple shots of the purple and green favia. the colors are beautiful and I’m hoping it’ll heal and eventually grow in this tank. The first pic was taken just after i put it in and the second was today just a little while ago. It’s not looking as good today imo But im hoping that’s just the stress of being broken and moved.

1661010590005.jpeg
1661010628855.jpeg
 
Back
Top